Five simple steps to improve website accessibility
December 10, 2022
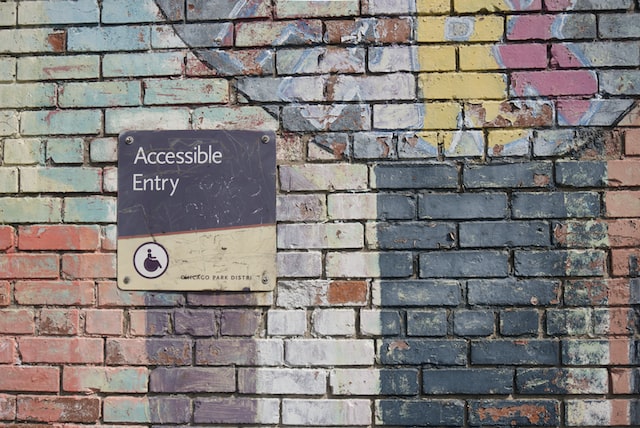
web-developmenthtmlbest-practiceaccessibilityAccessibility is very important. It ensures that anything we make is available to a greater number of people. It is not just about people who use screen readers.
Web Content Accessibility Guidelines (WCAG) set down a set of rules on how to make websites accessible to people with health conditions or impairments.
It is hard to meet all the WCAG criterions. It requires understanding of each criterion and the sufficient techniques to meet those requirements. I have been working to improve accessibility in our product. Most of the time I’ve only needed to remember five things.
1. Add labels to interactive elements(buttons, links, input etc.) and descriptive text to images
Interactive elements like buttons, links, and form elements should have labels. Images should have alternative text. This ensures assistive technologies are able to get context for these page elements.
Buttons
Buttons are used to trigger an action. Best practice is to name it to something that describes the action.
- Save
- Download
- Delete
- Add
- etc.
<button>Save</button>
<button><image src="download.svg" alt="" /> Download this wallpaper </button>
There will be instances that you may want to hide the label e.g. icon buttons. You can still be accessible by adding an aria-label.
<button aria-label="Delete"><image src="delete.svg" alt=""/></button>Links
We use links to provide a way to navigate to other locations on the net. It can be another web page, email address, or a section on the current page. So link labels should convey the purpose or destination.
<a href="/home"> Home </a>Link to download an image
For links with images, you can add an adjacent text or provide the image with alternative text.
<a href="/wallpaper-wide.jpg"><image src="thumbnail.png" alt="Download wallpaper" /></button>
<p> Email me to <a href="mailto:help@codespud.com">get help.</a> </p>Link to new window or tab
Sometimes you want to provide a portion of the text to screen readers. Style the text so that they are hidden but visible to screen readers.
<a target="_blank" href="http://google.com">
 Go to Google
 <span class="screenreader-only">(Link opens in a new tab)</span>
</a>
.screenreader-only {
position:absolute;
left:-10000px;
top:auto;
width:1px;
height:1px;
overflow:hidden;
}Link text should be unique
<!-- Do NOT do this! -->

<ul>
 <li>
 <span>John Doe</span>
 <a href="/user/1">Read Profile</a>
 </li>
 <li>
 <span>Sam Flag</span>
 <a href="/user/2">Read Profile</a>
 </li>
 <li>
 <span>Rick Star</span>
 <a href="/user/4">Read Profile</a>
 </li>
</ul>
Screen reader users can scan links and may bypass context when they do. The markup above will make it hard for the user to locate the information they are looking for.
<!-- Better! -->

<ul>
 <li>
   <a href="/user/1">John Doe <span class="screenreader-only">profile</span></a>
 </li>
 <li>
   <a href="/user/2">Sam Flag <span class="screenreader-only">profile</span></a>
 </li>
 <li>
   <a href="/user/3">Rick Star <span class="screenreader-only">profile</span></a>
 </li>
</ul>
Now the screen reader can jump to these links and immediately understand that these are links to user profiles.
Form elements
Form elements must have labels. This should be a name or short description of the data you are collecting. For radio or checkbox input types, describe the relationship of the invidual items.
Explicit labels
Using label tag
<label for="firstname">First name<label>
<input type="text" name="firstname" id="firstname" /><input type="checkbox" name="attending" id="attending" />
<label for="attending">Attend event<label>Using aria-label
<input type="search" aria-label="Search" />
<button>Search</button>
Implicit labels
<label>
 Firstname:
 <input type="text" name="firstname" />
</label>
Checkbox and radio input tags
<label>
 <input type="checkbox" name="attending" />
 Attend event
</label>

<fieldset>
<legend>Choose a fruit to buy</legend>
<label>
 <input type="radio" name="fruit" value="apple"/> Apple
</label>
<label>
 <input type="radio" name="fruit" value="pineapple"/>Pineapple
</label>
 <label>
 <input type="radio" name="fruit" value="pear"/> Pear
 </label>
</fieldset>
Images
Alternative text should describe the image. It is useless for impaired users to hear the image filename.
 <img src="blue-sky.jpg" alt="Beautiful clear summer sky " />
 <img src="couple.png" alt="Senior couple holding hands" />
Using figure tag
 <figure>
 <img src="couple.png" alt="" />
 <figcaption>Senior couple holding hands</figcaption>
 </figure>
Embedded SVG uses title
<svg viewBox="0 0 20 10" xmlns="http://www.w3.org/2000/svg">
<polygon points="473.486,182.079 310.615,157.952 235.904,11.23 162.628,158.675 0,184.389 117.584,299.641 91.786,462.257 237.732,386.042 384.416,460.829 357.032,298.473 "/>
 <title>A black star</title>
 </polygon>
</svg>
2. Do a keyboard test. Ensure focus order makes sense.
Screen readers and assistive technologies work with/like a keyboard. Ensuring that your site is keyboard accessible will help in navigating through interactive elements like buttons and links.
The rule is if an element is operable using the mouse then you should be able to do the same via the keyboard.
At the very least, a user should be able to:
- Navigate through elements using the Tab (and Shift + Tab) key.
- Confirm action using the Enter key or Spacebar.
- Close a revealed widget using the Escape key e.g. popup menu.
It is important to understand the UI/page/form functionality. Check that each functional element is navigate-able and operable using the keyboard.
The focus order should follow the visual order on the page. If you find something out of place or an element is not focusable. Refactor your code or add tabindex to manage the focus order.
Make focusable
<div tabindex="0" class="form-response">Submission is successful</div>Prevent element from getting focus
<div class="drawer is-closed" tabindex="-1"></div>3. Use semantic markup
Semantic elements
- Region (main, nav, footer, header etc.)
- Lists (ol, ul, li, dl, dt, dd)
- Headings (h1, h2, h3 etc.)
- Content (article, section)
- For emphasis (strong, em, b, i, u etc.)*
* In the past, its not recommended to use
b,iandutag when you intend to style a phrase or word to provide emphasis. Latest Screen readers now can understandstrongandb(old) tag serve the same purpose. It is true foremanditoo.
Landmark tags provide shortcuts for assistive technologies to bypass blocks on a page. For example, a user can go straight to the main content (marked by the main tag) or jump to the navigation block to move to a new page (wrapped by nav tag).
Headings aid assistive technologies to skip through topics on a page. For example, if I only want to know about the legal ramifications of whaling, I can locate the third heading and read on the topic.
 <h2>Moby Dick and whales in literature</h2>
 <p>Captain Ahab's nemesis ... </p>

 <h2>How to catch a whale</h2>
 <p>First, you need a boat. ... </p>

 <h2>Whaling is illegal in most countries</h2>
 <p>IWC banned the practice in 1986 ... </p>
Use list tags to describe a collection. Screen readers will anounce a list and help it navigate each item and were you are in the list.
<!-- screen reader will treat this as a block of text
Do NOT do this if you intend to present a list -->

<h3> Fruits on sale</h3>
<div class="list">
  <span>Pineapple</span>
  <span>Apple</span>
  <span>Mango</span>
  <span>Pear</span>
</div>

<!-- proper list uses list elements -->

<h3> Fruits on sale </h3>
<ul class="list">
  <li>Pineapple</li>
  <li>Apple</li>
  <li>Mango</li>
  <li>Pear</li>
</ul>
4. Make sure to have color and non-color indicators to convey the same information.
Using a red asterisk to tag required fields is a classic example of this. Using a symbol and a color ensures that color-impaired users can distinguish required fields.
Another example is adding patterns to a chart. Using patterns in conjunction with color make charts more inclusive. Imagine looking at a bar chart using only a color key. If a user suffering color blindness look at the same chart, he/she will find it hard to understand.
5. Use relative sizing for fonts
For font-size, use relative units(em, rem) instead of absolute units (px, pt). I recommend using rem with a body font size of 16px. Using relative units will ensure that users that need to zoom in on text are able to. This is especially important in mobile devices with smaller screens.
body { font-size: 16px }
h1 { font-size: 4 rem }
h2 {font-size: 2.5 rem }
blockquote { font-size: 1.25rem }
p {font-size: 1rem}
Wrapping up
There are more things to do to make a truly accessible website like color contrast and using ARIA attributes. For now, follow these few simple steps and you will have a more inclusive site that caters to a wider audience than just leaving it as is.